노마드코더의 React Native를 사용한 날씨앱 만들어보기를 따라할 것이다.
일단 날씨를 하기 전에 내가 위치해있는 위치를 가져오는 API를 사용해볼 것이다.
위치를 가져온 다음, 해당 위치에서 16일 간의 기상 예보를 가져오는 게 목표이다.
전 게시물에서 이야기 했던 것처럼 Expo API 문서에서 Location API를 사용한다.
https://docs.expo.dev/versions/v44.0.0/sdk/location/
Location - Expo Documentation
Expo is an open-source platform for making universal native apps for Android, iOS, and the web with JavaScript and React.
docs.expo.dev
우선, 배경색을 먼저 깔아줄 것이다.
import { StatusBar } from 'expo-status-bar';
import * as React from 'react';
import { Text, View, StyleSheet } from 'react-native';

export default function App() {
  return (
    <View style={{flex: 1, backgroundColor: "tomato"}}>
      <StatusBar style="light" />
    </View>
  );
}
StatusBar가 있고 없고의 차이점도 한 번 비교해보고 넘어가면 좋다.
StatusBar를 light로 설정함으로써 시간, 와이파이, 배터리 표시 부분이 하얗게 변할 것이다.
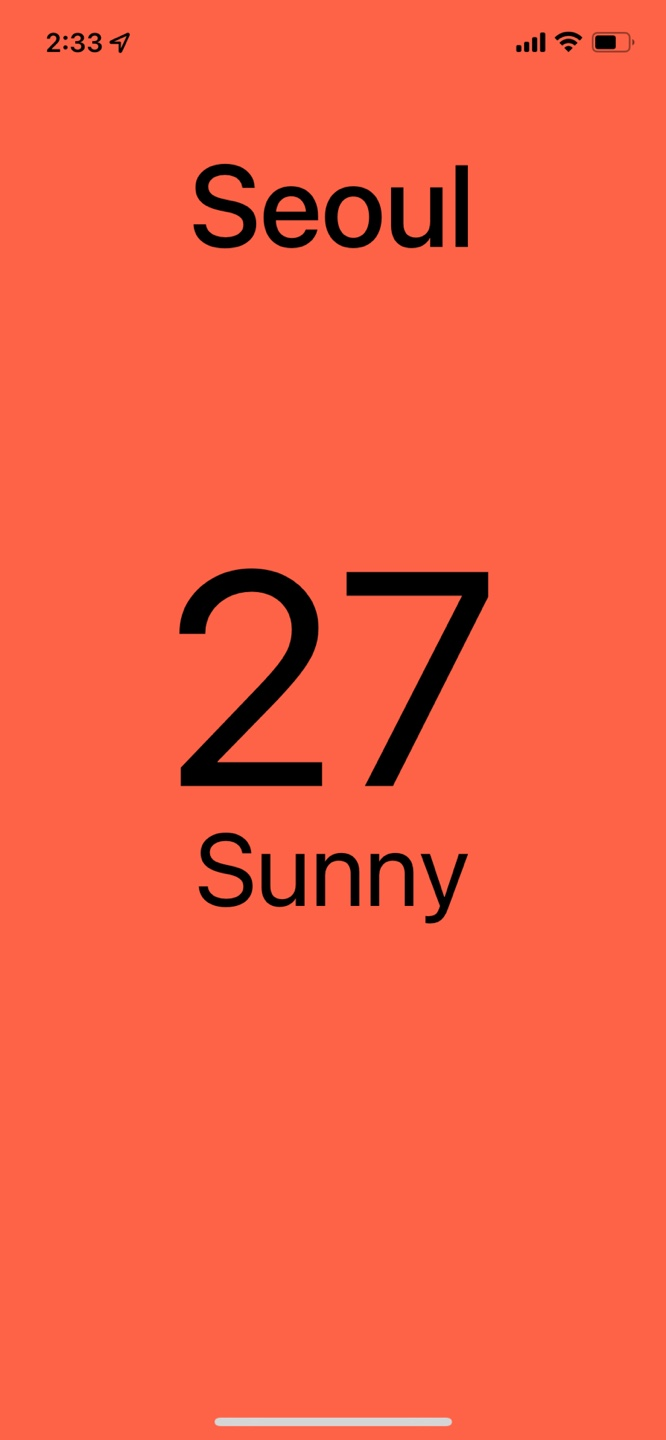
이제는 아래와 같은 화면을 만들 것이다.

아래 같은 화면을 만들 때, Text를 가운데 정렬하는 방법은 justifyContent, alignItems 두 가지를 center 설정을 준다.
justifyContent는 수직 정렬, alignItems는 수평 정렬이니 참고하면 된다.
import { StatusBar } from 'expo-status-bar';
import * as React from 'react';
import { Text, View, StyleSheet } from 'react-native';

export default function App() {
  return <View style={styles.container}>
      <View style={styles.city}>
        <Text}>Seoul</Text>
      </View>
      <View style={styles.weather}>
        <Text>눈</Text>
      </View>
    </View>;
}

const styles = StyleSheet.create({
  container: {
    flex: 1,
    backgroundColor: "tomato",
  },
  city: {
    flex: 1.2,
    backgroundColor: "blue",
    justifyContent: "center",
    alignItems: "center",
  },
  weather: {
    flex: 3,
    backgroundColor: "teal",
    justifyContent: "center",
    alignItems: "center",
  }
})
색깔로 구분을 한 이유는 아직 레이아웃 개념이 헷갈릴 수 있어서 잘 구분되고 있는지 색깔로 확인한 것이다.
이제는 색깔을 다시 tomato로 통일해주고 다음 내용을 진행할 것이다.
그 다음은 배웠던 내용을 조금만 활용해서 글씨 크기와 정렬을 맞추어서 아래와 같은 모습으로 만들어주면 된다.

위의 사진을 먼저 보고 직접 만들어본 다음에 모르는 내용이 나오면 아래 코드를 참고하여 작성해주면서 마무리하면 된다.
import { StatusBar } from 'expo-status-bar';
import * as React from 'react';
import { Text, View, StyleSheet, ScrollView } from 'react-native';

export default function App() {
  return <View style={styles.container}>
      <View style={styles.city}>
        <Text style={styles.cityName}>Seoul</Text>
      </View>
      <View style={styles.weather}>
      <View style={styles.day}>
          <Text style={styles.temp}>27</Text>
          <Text style={styles.description}>Sunny</Text>
        </View>
      </View>
    </View>;
}

const styles = StyleSheet.create({
  container: {
    flex: 1,
    backgroundColor: "tomato",
  },
  city: {
    flex: 1.2,
    justifyContent: "center",
    alignItems: "center",
  },
  cityName: {
    fontSize: 68,
    fontWeight: "500"
  },
  weather: {
    flex: 3,
  },
  day: {
    flex:1,
    alignItems: "center",
  },
  temp: {
    marginTop: 50,
    fontSize: 178,
  },
  description: {
    marginTop: -30,
    fontSize: 60,
  },
})
하면서 레이아웃 나누는 게 어려울 수도 있다. 그럴 때는 style에 색깔을 줘서 하면 좀 더 쉽게 작업할 수 있으니 참고하면 좋을 것 같다!
그 다음은 아래 Container에서 day 스타일을 준 자식이 여러 개로 늘어났을 때, 밑으로 쭈욱 늘어났을 것이다.
그럴 경우에 스크롤의 여부를 확인해보면, 스크롤 기능은 없는 것을 확인할 수 있을 것이다.
그러면 스크롤 기능은 어떻게 추가하지? 라는 생각이 든다면 무조건 공식 문서를 먼저 확인해보면 된다.
공식 문서에서 ScrollView 기능이 있는 것을 확인할 수 있을 것이다.
https://reactnative.dev/docs/scrollview
ScrollView · React Native
Component that wraps platform ScrollView while providing integration with touch locking "responder" system.
reactnative.dev
사용 방법을 살펴보고 그대로 적용시켜주자.
import { StatusBar } from 'expo-status-bar';
import * as React from 'react';
import { Text, View, StyleSheet, ScrollView } from 'react-native';

export default function App() {
  return <View style={styles.container}>
      <View style={styles.city}>
        <Text style={styles.cityName}>Seoul</Text>
      </View>
      <ScrollView style={styles.weather}>
        <View style={styles.day}>
          <Text style={styles.temp}>27</Text>
          <Text style={styles.description}>Sunny</Text>
        </View>
        <View style={styles.day}>
          <Text style={styles.temp}>27</Text>
          <Text style={styles.description}>Sunny</Text>
        </View>
        <View style={styles.day}>
          <Text style={styles.temp}>27</Text>
          <Text style={styles.description}>Sunny</Text>
        </View>
        <View style={styles.day}>
          <Text style={styles.temp}>27</Text>
          <Text style={styles.description}>Sunny</Text>
        </View>
      </ScrollView>
    </View>;
}

... 아래 부분은 생략
스크롤이 되는 것을 확인할 수 있다.
만약?! 나는 스크롤이 위 아래가 아닌 옆으로 되는 스크롤 기능을 원했다면 어떻게 해야하지?
또, 공식문서... 구글링을 하면 된다.
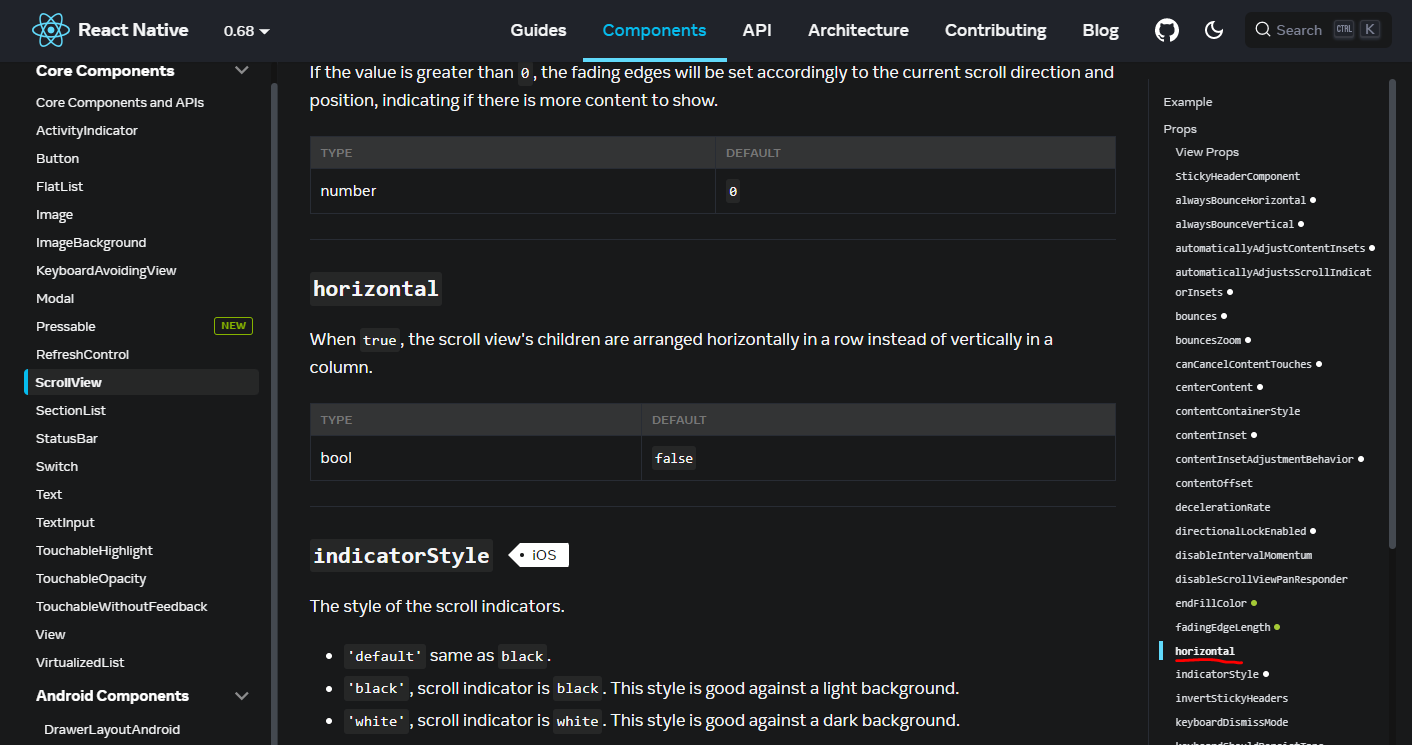
공식문서에서는 해당 기능에 부가 기능은 오른쪽에서 확인할 수 있다.

오른쪽에서 horizontal 부가 기능을 볼 수 있는데 해당 부가 기능이 양옆으로 스크롤을 가능하게 해줄 것이다.
그럼 한 번 적용해보자.
import { StatusBar } from 'expo-status-bar';
import * as React from 'react';
import { Text, View, StyleSheet, ScrollView } from 'react-native';

export default function App() {
  return <View style={styles.container}>
      <View style={styles.city}>
        <Text style={styles.cityName}>Seoul</Text>
      </View>
      <ScrollView horizontal style={styles.weather}>
        <View style={styles.day}>
          <Text style={styles.temp}>27</Text>
          <Text style={styles.description}>Sunny</Text>
        </View>
        <View style={styles.day}>
          <Text style={styles.temp}>27</Text>
          <Text style={styles.description}>Sunny</Text>
        </View>
        <View style={styles.day}>
          <Text style={styles.temp}>27</Text>
          <Text style={styles.description}>Sunny</Text>
        </View>
        <View style={styles.day}>
          <Text style={styles.temp}>27</Text>
          <Text style={styles.description}>Sunny</Text>
        </View>
      </ScrollView>
    </View>;
}

...
그림에서는 스크롤 기능을 담진 못했지만, 직접 해보면 좌우크롤이 되고 있음을 확인할 수 있다.

스크롤을 적용하면서 이상한 점이 있었을 것이다.
이상한 점을 찾지 못했다면, weather style에 backgroundColor을 blue로 설정해보자.
바로 flex가 3이였는데 해당 정렬 비율이 잘 맞지 않는다는 것이다.
부가 기능 오른쪽에 contentContainerStyle 부분을 누르고, 확인할 수 있다.]

코드를 수정해주자.
그러면 flext도 잘 고정돼서 나오는 걸 확인할 수 있다.
그러나 문제가 하나 더 생겼을 것이다. 이번에는 스크롤이 되는 듯 하다가 다시 되돌아오는 현상을 확인할 수 있다.
이러한 문제가 생기는 이유는 flex로 고정해놓았기 때문이다.
ScrollView 라는 개념 자체가 Screen을 넘어가는 것을 주의해야한다.
weather style의 flex: 3을 제거하고 저장하면 스크롤이 작동하는 것을 볼 수 있다.
스크롤을 좀 더 칸 별로 넘어갈 수 있게 만드는 방법은 pagingEnabled 를 사용하는 것이다.
ScrollView horizontal 뒤에 추가시켜주면 된다.
넘길 때 하단에 생기는 칸을 보면 한 칸 한 칸 마다의 스크롤 indicator을 만들어주는 것을 확인할 수 있다.
그럼 이 indicator를 false로 설정해서 안 보이게 만드는 속성을 적용시켜보자.
적용시키는 방법은 아래와 같다.
showsHorizontalScrollIndicator={false}
<ScrollView
	pagingEnabled
	horizontal
	showsHorizontalScrollIndicator={false}
	contentContainerStyle={styles.weather}
>
이제는 날씨 API를 사용해서 날씨를 가져오는 작업을 해보자!
https://ohrora-developer.tistory.com/12
React Native 날씨앱 만들기2 (노마드코더)
React Native 날씨앱 만들기1 (노마드코더)Weather API를 사용해서 날씨를 가져올 것이다. 사용할 API는 유명한 OpenWeatherMap API를 사용한다. https://openweathermap.org/api Weather API - OpenWeatherMa..
ohrora-developer.tistory.com
'React Native' 카테고리의 다른 글
| React Native 날씨앱 만들기3 (노마드코더) (0) | 2022.05.04 |
|---|---|
| React Native 날씨앱 만들기2 (노마드코더) (0) | 2022.04.28 |
| expo request time out 이 발생하는 경우 (1) | 2022.04.28 |
| Expo Location API 사용해보기 (0) | 2022.04.24 |
| React Native 스크린 크기를 구해보자! (Dimension) (0) | 2022.04.22 |


